Seasoning your Dutch oven is more than just a cooking ritual—it’s the secret to unlocking its full potential and ensuring it lasts for generations. Whether you're a seasoned chef or a home cook looking to upgrade your kitchen skills, mastering the art of Dutch oven seasoning is essential. Proper seasoning not only enhances the flavor of your meals but also protects your cookware from rust and damage. Let’s dive into how you can achieve the perfect seasoning for your Dutch oven.
Learning the intricacies of Dutch oven seasoning might seem daunting at first, but with the right techniques and tools, anyone can become a pro. In this article, we’ll guide you through every step of the seasoning process, offering tips and tricks to ensure your Dutch oven remains in top condition for years to come.
From understanding the science behind seasoning to implementing practical methods, we’ll cover everything you need to know. So, let’s get started on your journey to master the art of Dutch oven seasoning for long-lasting cookware.
Read also:Thalia Matos Leaks Understanding The Impact And Addressing Concerns
Table of Contents
- Why Season Your Dutch Oven?
- Preparation Steps Before Seasoning
- Seasoning Methods for Your Dutch Oven
- Sub-Steps in Dutch Oven Seasoning
- Maintaining a Well-Seasoned Dutch Oven
- Common Issues and How to Fix Them
- Tips for Long-Lasting Cookware
- The Science Behind Dutch Oven Seasoning
- Tools and Materials You’ll Need
- Conclusion: Take Your Dutch Oven to the Next Level
Why Season Your Dutch Oven?
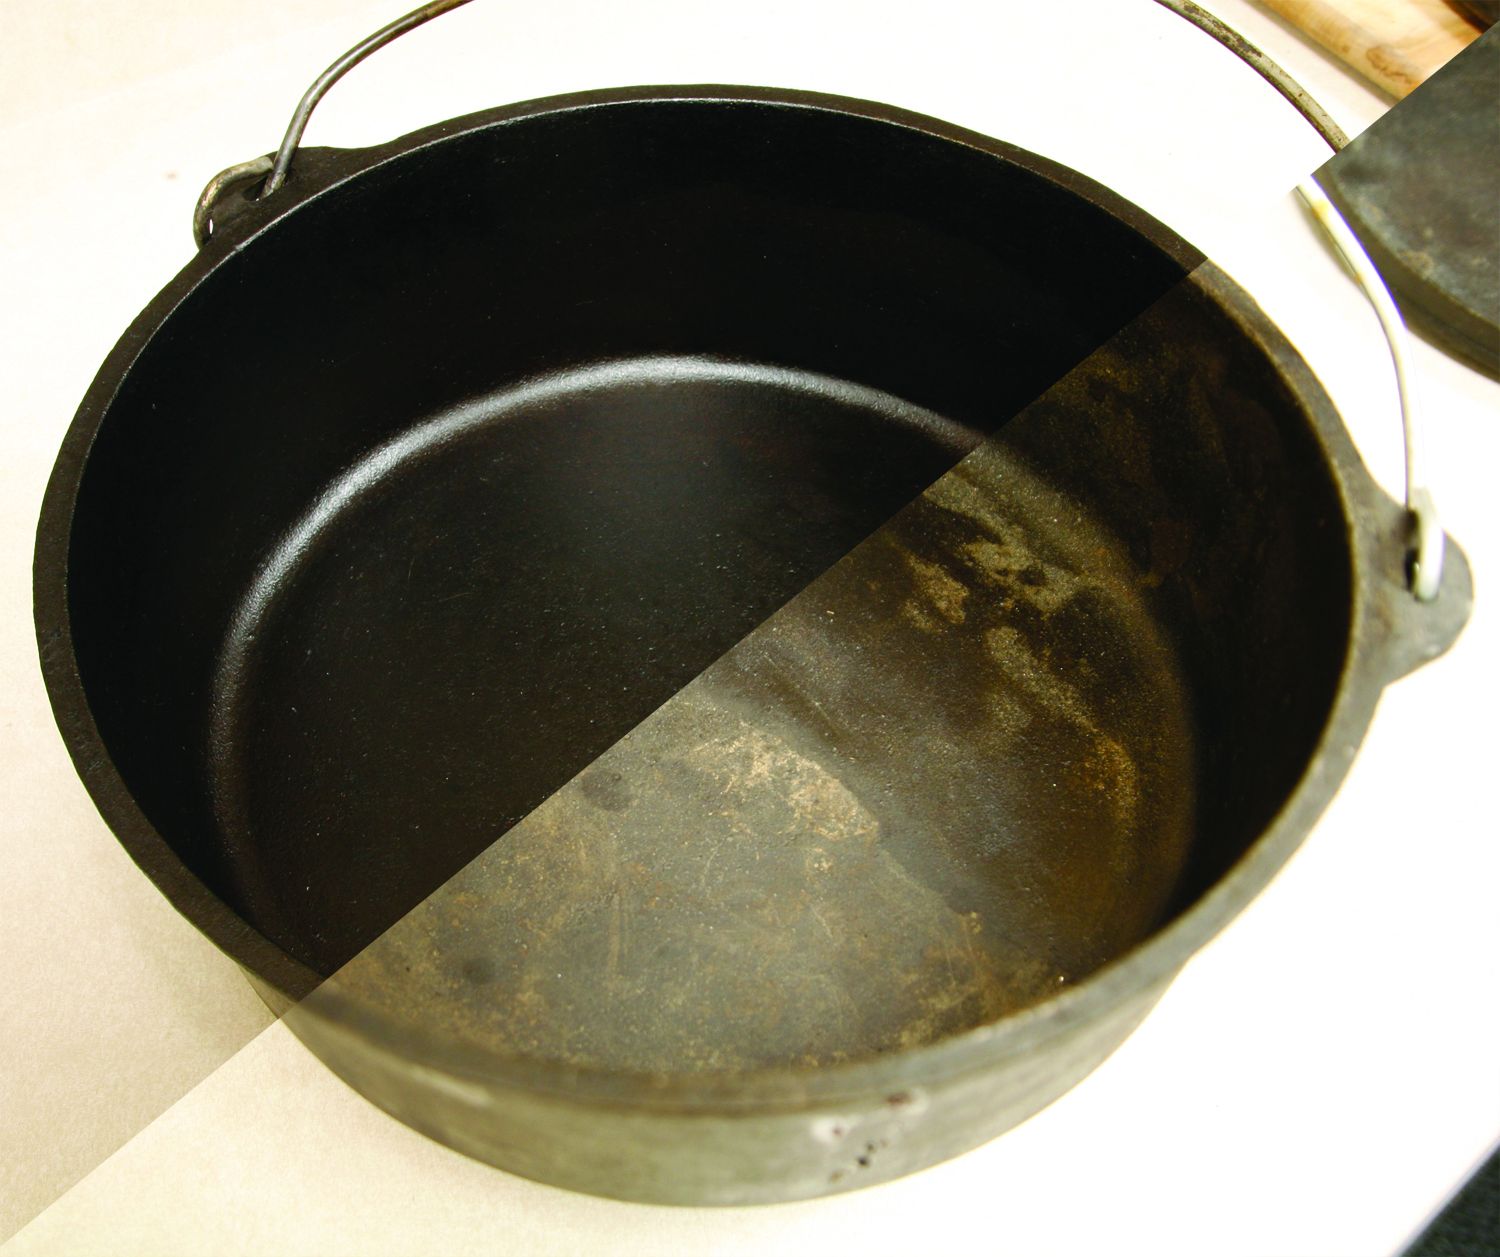
Seasoning your Dutch oven is crucial for several reasons. First and foremost, it creates a natural non-stick surface that enhances your cooking experience. This process involves coating the cast iron with oil and heating it to create a polymerized layer that protects the metal from rust and corrosion.
Seasoning also improves the flavor of your food. Over time, the oils used in the seasoning process infuse into the metal, adding a rich, savory taste to every dish you prepare. Furthermore, a well-seasoned Dutch oven is easier to clean and maintain, saving you time and effort in the long run.
Preparation Steps Before Seasoning
Wash and Dry Thoroughly
Before you start seasoning, it's essential to clean your Dutch oven thoroughly. Use warm water and a mild detergent to remove any residue or debris. Avoid using abrasive scrubbers that might damage the surface. Once cleaned, dry the Dutch oven completely with a clean towel and let it sit for a few minutes to ensure no moisture remains.
Inspect for Rust
Check your Dutch oven for any signs of rust. If you notice any rust spots, gently scrub them off with fine steel wool or a wire brush. Afterward, wash and dry the Dutch oven again to remove any particles left behind.
Seasoning Methods for Your Dutch Oven
Method 1: Oven Seasoning
Oven seasoning is one of the most effective ways to achieve a durable, long-lasting finish. Start by preheating your oven to 350°F (175°C). Apply a thin, even layer of oil to the entire Dutch oven, including the lid and bottom. Place the Dutch oven upside down on the middle rack of the oven, with a sheet of aluminum foil or a baking sheet underneath to catch any drips. Bake for one hour, then turn off the oven and let the Dutch oven cool inside.
Method 2: Stovetop Seasoning
For those without access to an oven, stovetop seasoning is a viable alternative. Heat the Dutch oven on a low flame and apply a small amount of oil to the surface. Use a paper towel or cloth to spread the oil evenly. Allow the oil to heat and polymerize for about 10-15 minutes, then remove the Dutch oven from heat and let it cool completely.
Read also:How Tall Is Diddy A Comprehensive Look At The Iconic Artists Height
Sub-Steps in Dutch Oven Seasoning
- Step 1: Choose the right oil (e.g., flaxseed oil, vegetable oil).
- Step 2: Apply a thin, even layer of oil to the Dutch oven.
- Step 3: Heat the Dutch oven in the oven or on the stovetop.
- Step 4: Repeat the process 3-5 times for optimal results.
Maintaining a Well-Seasoned Dutch Oven
Proper maintenance is key to keeping your Dutch oven in excellent condition. After each use, avoid soaking the Dutch oven in water for extended periods. Instead, wipe it clean with a paper towel or use warm water with a sponge to remove food residue. Dry it immediately afterward to prevent rust.
Reapply a thin layer of oil after cleaning to maintain the seasoning layer. If you notice any spots where the seasoning has worn off, repeat the seasoning process to restore its integrity.
Common Issues and How to Fix Them
Rust Formation
Rust is a common problem with cast iron cookware. To fix it, gently scrub the rusted areas with fine steel wool or a wire brush. Wash and dry the Dutch oven thoroughly, then reapply a fresh layer of oil and repeat the seasoning process.
Sticky Surface
A sticky surface usually indicates excessive oil application during seasoning. To resolve this, place the Dutch oven in a preheated oven at 400°F (200°C) for 30 minutes. This will help burn off any excess oil and restore the surface to its proper state.
Tips for Long-Lasting Cookware
- Always store your Dutch oven in a dry place to prevent rust.
- Use wooden or silicone utensils to avoid scratching the seasoning layer.
- Season your Dutch oven regularly, especially if it’s used frequently.
- Experiment with different oils to find the one that works best for you.
The Science Behind Dutch Oven Seasoning
The science behind Dutch oven seasoning lies in the process of polymerization. When oil is heated to high temperatures, it undergoes a chemical reaction that transforms it into a hard, durable layer. This layer not only protects the metal from rust but also creates a non-stick surface that enhances the cooking experience.
Flaxseed oil is often recommended for seasoning because of its high polymerization properties. However, other oils like vegetable oil and canola oil can also be effective, depending on personal preference and availability.
Tools and Materials You’ll Need
To successfully season your Dutch oven, you’ll need the following tools and materials:
- A clean, dry cloth or paper towel.
- Your choice of oil (flaxseed, vegetable, or canola).
- A baking sheet or aluminum foil (for oven seasoning).
- Fine steel wool or a wire brush (for rust removal).
- An oven or stovetop for heating.
Conclusion: Take Your Dutch Oven to the Next Level
In conclusion, mastering the art of Dutch oven seasoning is a skill that every cook should strive to achieve. By following the steps and tips outlined in this article, you can ensure your Dutch oven remains in top condition for years to come. Remember, proper seasoning and maintenance are key to enjoying the full benefits of this versatile cookware.
We invite you to share your experiences and tips in the comments section below. If you found this article helpful, don’t hesitate to share it with your friends and family. For more informative content on cooking and kitchen essentials, explore our other articles on the site.
Happy cooking and enjoy the journey of mastering your Dutch oven!