Removing chapstick stains from clothes can be a daunting task, especially when the garment has already been dried. However, with the right techniques and tools, you can effectively eliminate these stubborn stains without damaging your favorite garments. Whether you're dealing with chapstick stains on cotton, polyester, or other fabrics, this guide will walk you through every step of the process.
Stains caused by chapstick are common, especially for those who frequently use lip balm. These stains can leave unsightly marks on your clothing, but they don't have to ruin your day. This article will provide you with a detailed and comprehensive approach to removing chapstick stains from clothes, even after they've been dried.
By following the tips and tricks outlined here, you'll be able to restore your clothes to their original condition. We'll cover everything from understanding the composition of chapstick stains to utilizing professional-grade cleaning products. Let's dive in!
Read also:Peter Riegert A Comprehensive Guide To The Talented Actors Life And Career
Table of Contents
- Understanding Chapstick Stains
- Pre-Treatment Methods
- Removal Techniques
- Fabric-Specific Guidelines
- Tools and Products
- Step-by-Step Process
- Common Mistakes to Avoid
- When to Seek Professional Help
- Preventive Measures
- Frequently Asked Questions
Understanding Chapstick Stains
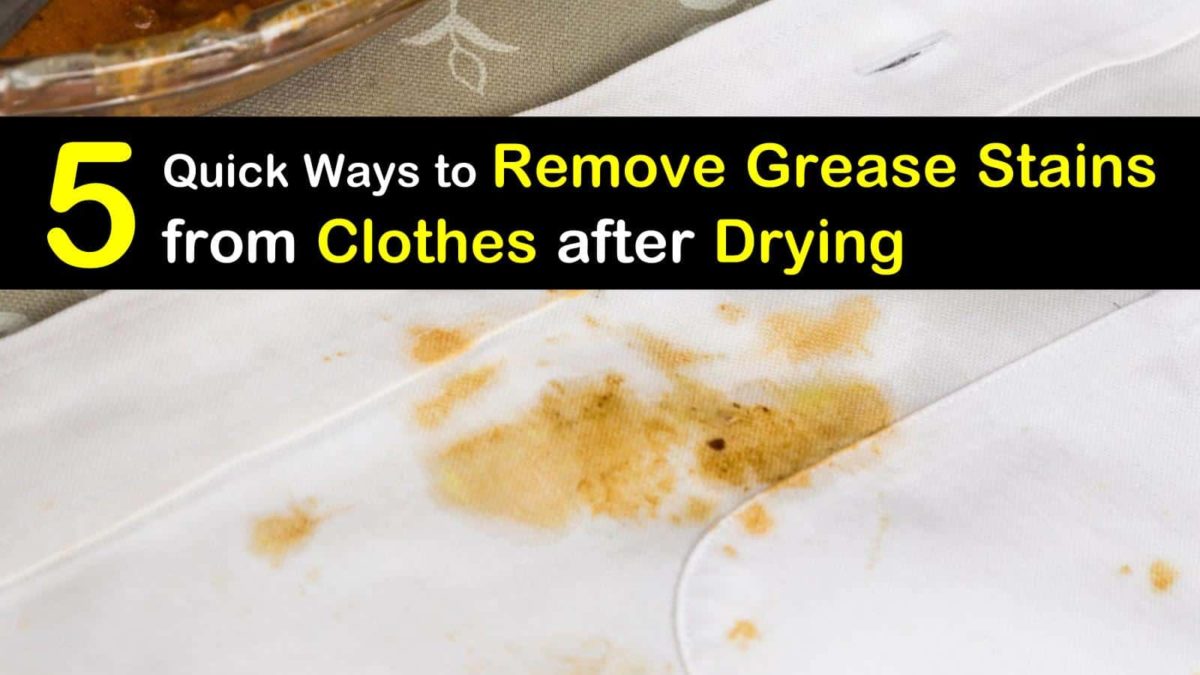
Before diving into the removal process, it's essential to understand what chapstick is made of and why it creates such stubborn stains. Chapstick typically contains petroleum jelly, wax, and fragrance oils, all of which can adhere to fabric fibers and become challenging to remove once dried.
Composition of Chapstick
Chapstick is composed of ingredients that are designed to moisturize and protect lips. These ingredients include:
- Petroleum jelly
- Beeswax or carnauba wax
- Essential oils
- Fragrance
When these components come into contact with fabric, they can form a greasy residue that requires specific cleaning methods to eliminate effectively.
Pre-Treatment Methods
Pre-treating a chapstick stain is crucial, especially if the garment has already been dried. This step helps loosen the stain and prepares it for more thorough cleaning.
Steps for Pre-Treatment
Here’s how you can pre-treat chapstick stains:
Read also:James Padraig Farrell The Visionary Entrepreneur Shaping The Future
- Scrape off any excess chapstick using a dull knife or spoon.
- Apply a small amount of dishwashing liquid directly onto the stain.
- Let it sit for 5-10 minutes to break down the grease.
- Rinse the area with warm water.
This pre-treatment process can significantly improve the effectiveness of the subsequent cleaning steps.
Removal Techniques
Once the stain has been pre-treated, it's time to move on to the removal techniques. These methods are designed to tackle chapstick stains on various types of fabrics.
Using Rubbing Alcohol
Rubbing alcohol is an effective solvent for breaking down the oils in chapstick. Here's how to use it:
- Dampen a cotton swab with rubbing alcohol.
- Gently rub the stained area in a circular motion.
- Blot with a clean cloth to absorb the loosened residue.
- Repeat until the stain is gone.
Fabric-Specific Guidelines
Different fabrics require different approaches when it comes to stain removal. Here are some guidelines for treating chapstick stains on common fabrics:
Cotton
Cotton is a durable fabric that can withstand most cleaning methods. For cotton garments, you can use:
- Hot water
- Strong detergents
- Spot cleaning solutions
Polyester
Polyester is less forgiving than cotton, so it's important to use:
- Cool water
- Gentle detergents
- Non-abrasive cleaning tools
Tools and Products
Having the right tools and products on hand can make the stain removal process much easier. Consider investing in:
- Dishwashing liquid
- Rubbing alcohol
- Gentle detergents
- White vinegar
- Baking soda
These items are readily available and can be used in combination for optimal results.
Step-by-Step Process
Follow this step-by-step process to remove chapstick stains from clothes:
- Scrape off excess chapstick: Use a dull knife or spoon to gently remove as much chapstick as possible.
- Apply dishwashing liquid: Rub a small amount of dishwashing liquid into the stain and let it sit for 5-10 minutes.
- Rinse with warm water: Rinse the area thoroughly to remove any soap residue.
- Use rubbing alcohol: Dab the stain with a cotton swab dipped in rubbing alcohol.
- Wash the garment: Launder the garment according to the care label instructions.
- Check for remaining stains: Inspect the garment before drying to ensure the stain is completely gone.
Common Mistakes to Avoid
Here are some common mistakes people make when trying to remove chapstick stains:
- Using hot water on synthetic fabrics, which can set the stain.
- Skipping the pre-treatment step, which can reduce the effectiveness of cleaning.
- Overusing cleaning products, which can damage the fabric.
Avoiding these mistakes will help you achieve better results.
When to Seek Professional Help
Some stains may be too difficult to remove at home. In such cases, it's best to seek professional help. Dry cleaners have access to specialized equipment and chemicals that can tackle even the toughest stains.
Benefits of Professional Cleaning
- Expertise in handling delicate fabrics
- Access to advanced cleaning technologies
- Guaranteed results
Preventive Measures
Preventing chapstick stains is easier than removing them. Here are some tips to keep your clothes stain-free:
- Store chapstick securely to prevent accidental spills.
- Use chapstick sparingly to minimize the risk of staining.
- Inspect clothes before washing to catch stains early.
Frequently Asked Questions
Q: Can I use vinegar to remove chapstick stains?
A: Yes, vinegar can be effective in breaking down the oils in chapstick. Mix equal parts white vinegar and water, and apply the solution to the stain before washing.
Q: Is it safe to use rubbing alcohol on all fabrics?
A: Rubbing alcohol is safe for most fabrics, but it's always a good idea to test it on a small, inconspicuous area first to ensure it won't cause discoloration.
Q: What should I do if the stain persists after washing?
A: If the stain remains after washing, repeat the cleaning process or consider taking the garment to a professional cleaner.
Q: Can I use baking soda to remove chapstick stains?
A: Baking soda can be used in combination with water to create a paste that can help lift chapstick stains. Apply the paste to the stain and let it sit for 15-20 minutes before washing.
Q: How do I remove chapstick stains from wool?
A: For wool fabrics, use cool water and a mild detergent. Avoid using heat, as it can damage the fibers.
Kesimpulan
Removing chapstick from clothes after drying doesn't have to be an impossible task. By following the steps outlined in this guide, you can effectively eliminate these stubborn stains and restore your garments to their original condition. Remember to pre-treat the stain, choose the right cleaning products, and avoid common mistakes. If the stain proves too difficult to remove, don't hesitate to seek professional help.
We encourage you to share your experiences and tips in the comments section below. Your feedback can help others who are facing similar challenges. Additionally, feel free to explore our other articles for more helpful tips on stain removal and fabric care.
References:
- Consumer Reports - Stain Removal Guide
- Mayo Clinic - Fabric Care Tips
- WebMD - Home Cleaning Solutions
/remove-melted-chapstick-stains-on-clothes-2146888-06-160a235f360c4a259273b529ebdff596.jpg)